Writing with Overleaf
1 Introduction to Overleaf
1.1 What is Overleaf?
Overleaf is a collaborative cloud-based LaTeX editor used widely in academic writing, particularly for scientific and technical documents. It allows real-time collaboration, version control, and seamless integration with reference managers and submission portals.
1.2 Why should you use Overleaf?
No installation required: Write LaTeX in your browser, no setup needed.
Templates: Access hundreds of journal templates, theses, and CVs.
Collaboration: Easily share projects with co-authors or supervisors.
Version control: All edits are saved, allowing you to track and revert changes.
Publisher integration: Submit directly to journals like IEEE, Springer, or Elsevier.
To get started, sign up for a free account at Overleaf
2 Understand the LaTeX Structure
Every LaTeX document has these 3 elements:
Preamble – Sets up document type and packages
Body – Contains the content: abstract, sections, figures, etc.
References – Managed with a
.bibfile (BibTeX)
% Preamble

% Document class
\documentclass[conference]{IEEEtran}  % Document class (e.g., article, report, IEEEtran)

% Packages
\usepackage{graphicx}  % For figures
\usepackage{amsmath}   % For math
\usepackage{cite}      % For references
\usepackage{hyperref}  % For clickable links

% Body

\begin{document}

\title{Your Paper Title}
\author{Your Name \\ Your Institution}

\maketitle  % Generates the title

\begin{abstract}
Write your abstract here.
\end{abstract}

\section{Introduction}
Write your Introduction here.

\section{Methodology}
Write your Methodology here.

\section{Results}
Write your Results here.

\section{Conclusion}
Write your Conclusion here.
...

% Reference

\bibliographystyle{IEEEtran}
\bibliography{references}  % assumes references.bib file

\end{document}
Now, we will break down each elements of a Basic LaTeX Structure
2.1 Preamble
Preamble includes Document class and Packages.
- Document class (what kind of document you’re writing):
article– general purposereport– for longer worksIEEEtran– for IEEE conferences/journalsrevtex4-2– APS/physics paperselsarticle– Elsevier journals
- Packages (extra tools you want LaTeX to use, like images, math, citations):
| Package | Purpose |
|---|---|
graphicx |
Inserting images |
amsmath |
Math formatting |
cite |
Clean bibliography citations |
hyperref |
Clickable links & references |
xcolor |
Colored text and tables |
geometry |
Page margins control |
2.2 Body
Sections such as Abstract, Introduction, Methods, Results, and Conclusion. Everything between \(\textbackslash{begin\{document\}}\) and \(\textbackslash{end\{document\}}\) in LaTeX language.
2.3 References
- Citations are managed using BibTeX or BibLaTeX, which automate the formatting of references. You store your bibliographic entries in a
.bibfile, then cite them in-text using commands like\cite{}.
3 Setting Up Your Research Paper
3.1 Creating a Project
Log in to Overleaf
Click New Project → Blank Project
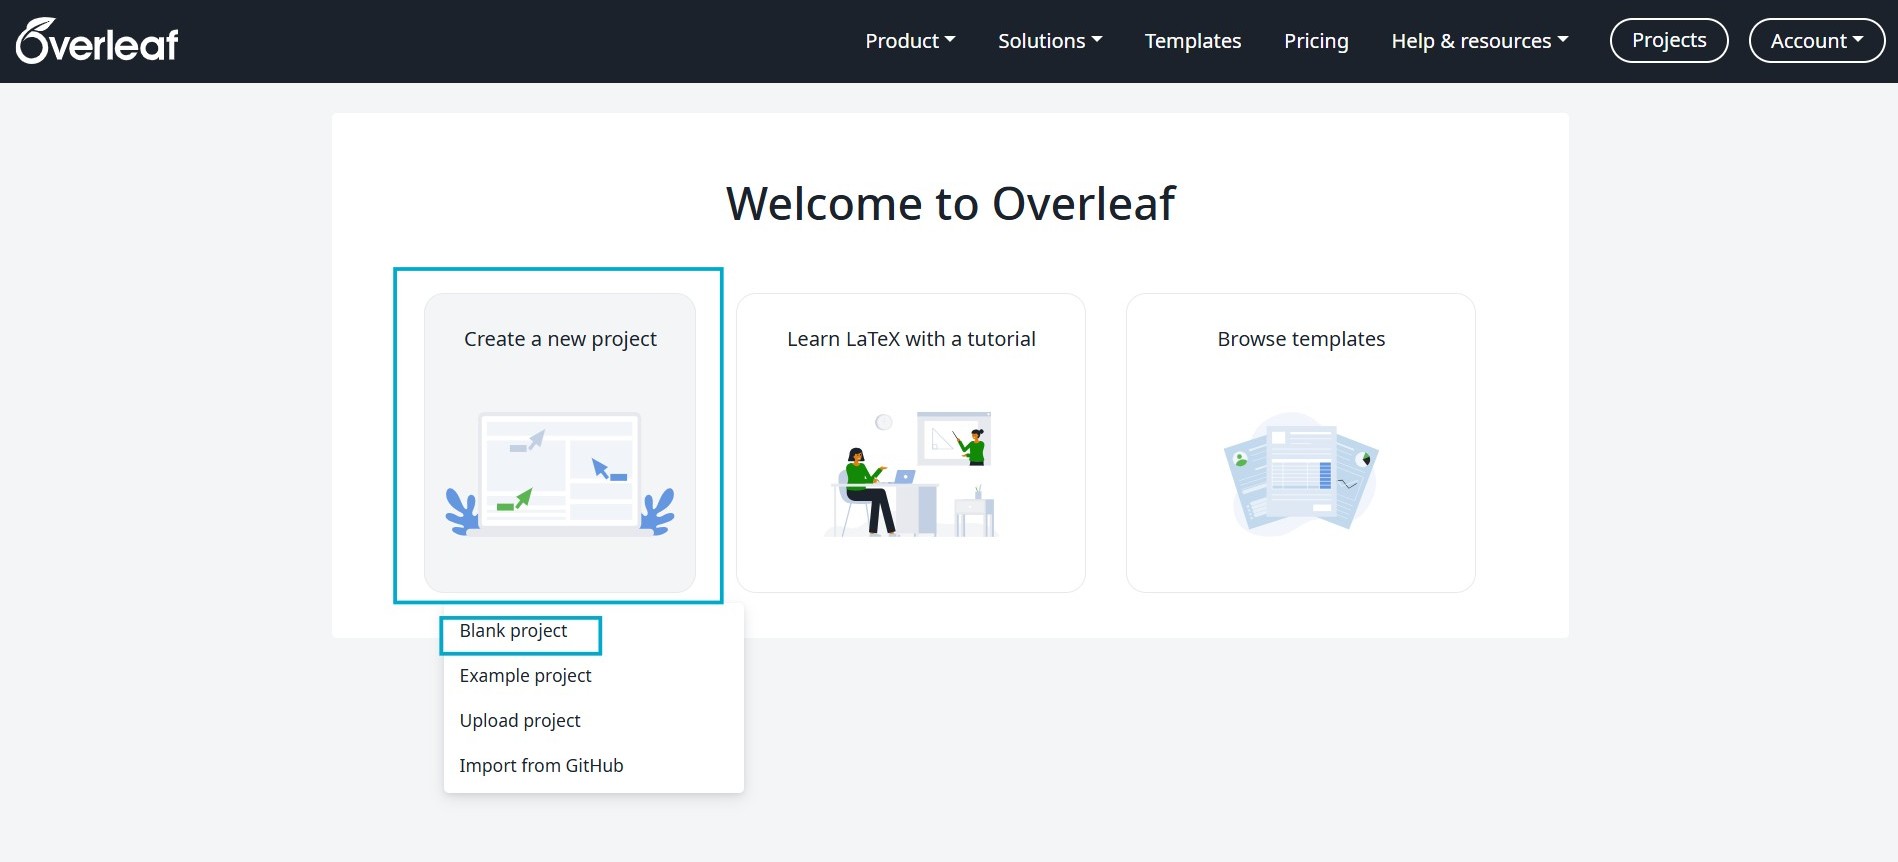
- Explore Overleaf Gallery to find:
Journal templates (e.g., IEEE, Elsevier, Springer).
Thesis or dissertation templates.
Conference paper formats.

Pick one that fits your needs or stick with a blank project if you want full control!
- Name your project (e.g., My Research Paper)
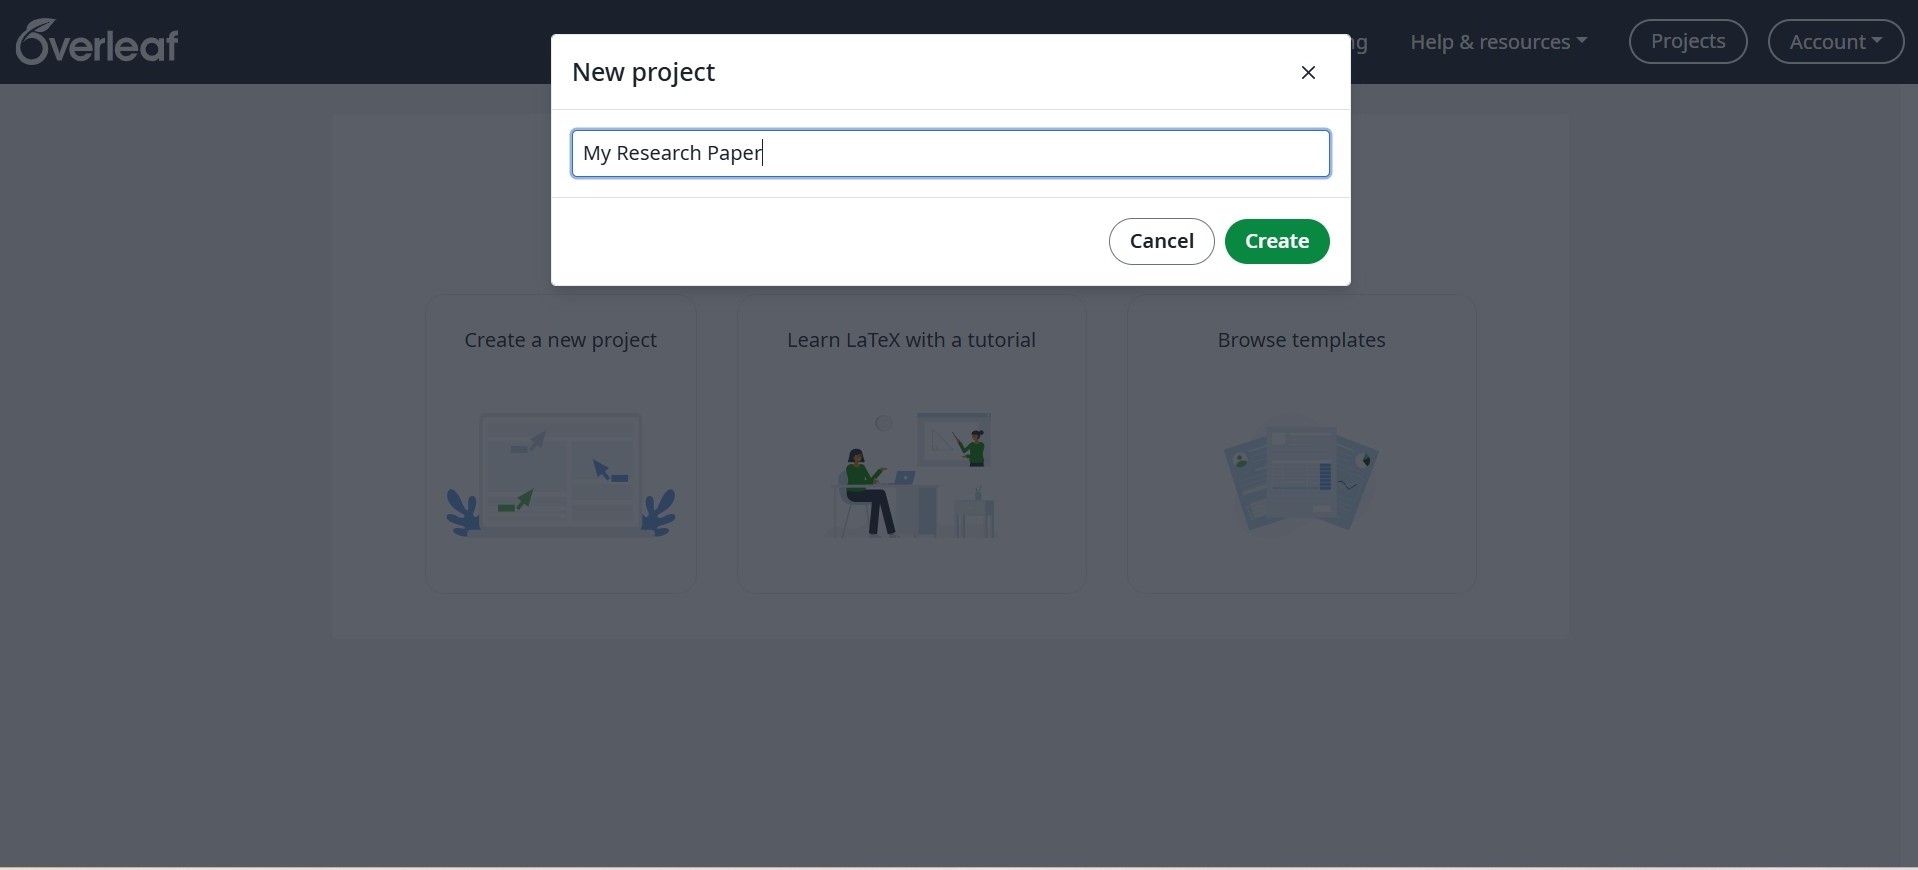
- Once your project opens, you’ll see the Overleaf editor window
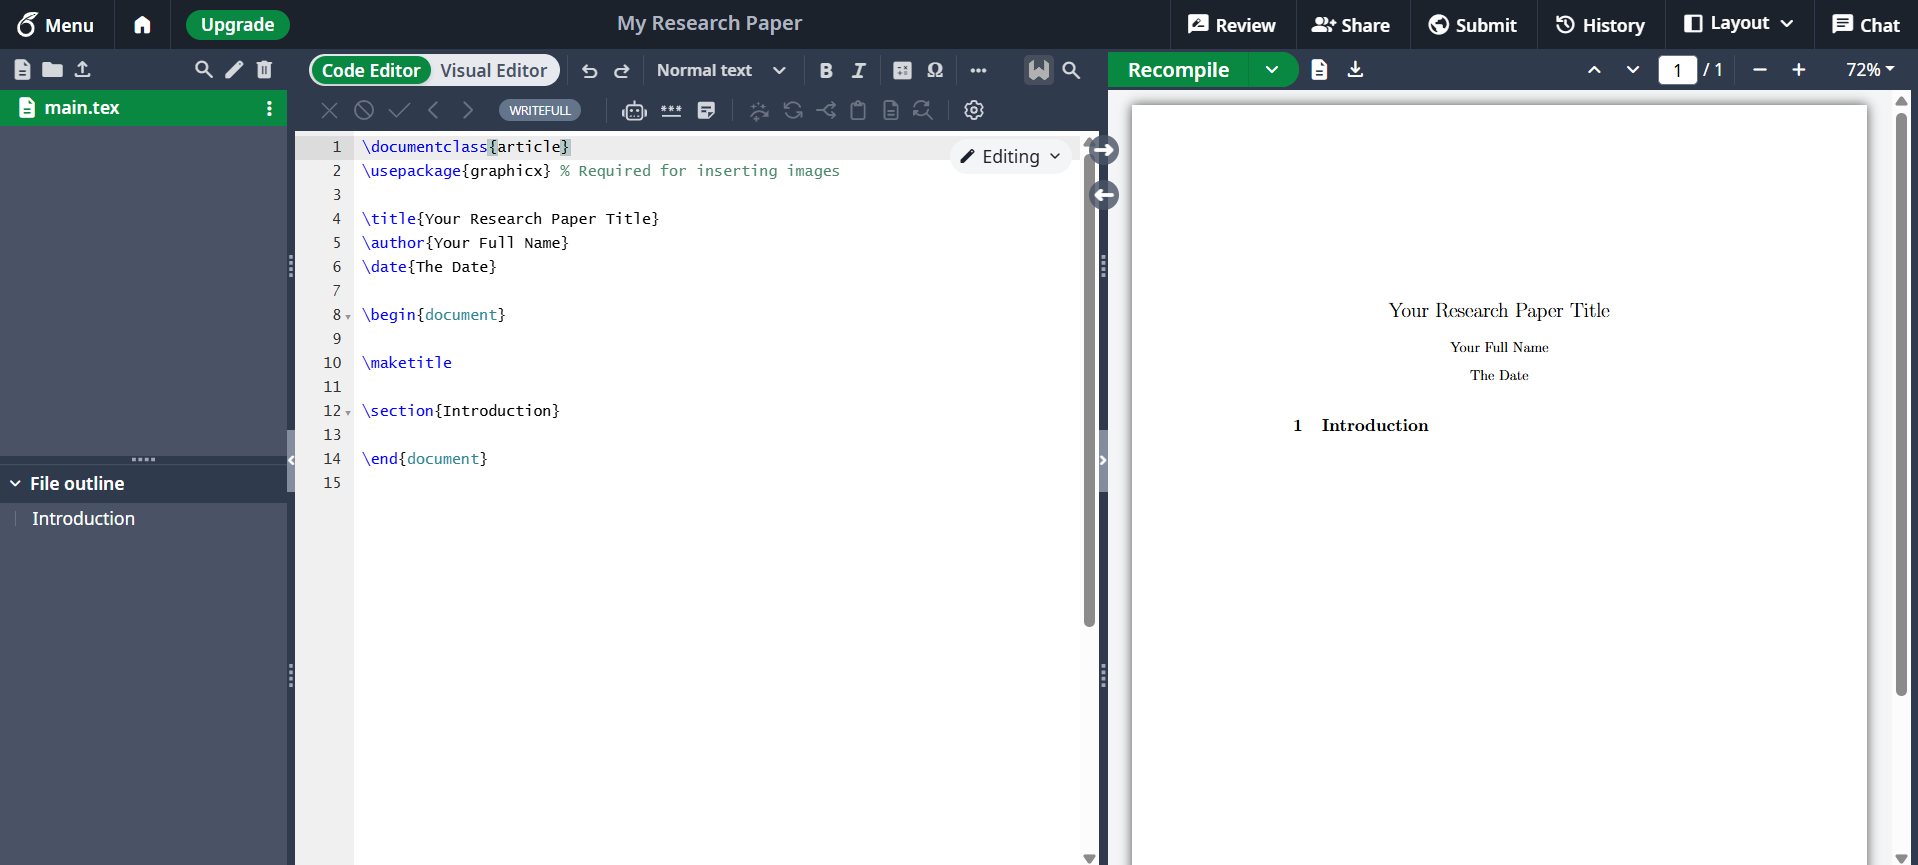
Here, you can:
Edit the preamble (where your document settings live)
Write your paper content directly in the body section
Preview your compiled document in real time
3.2 Writing the content
3.2.2 Structuring the Body
To break up your document, we use sectioning commands:
\section{Introduction}
\section{Methodology}
\section{Results}
\section{Conclusion}
Each of these will appear as a bold heading and will automatically be numbered (e.g., 1 Introduction, 2 Methodology, etc.), and the content you write beneath it will show up as body text.
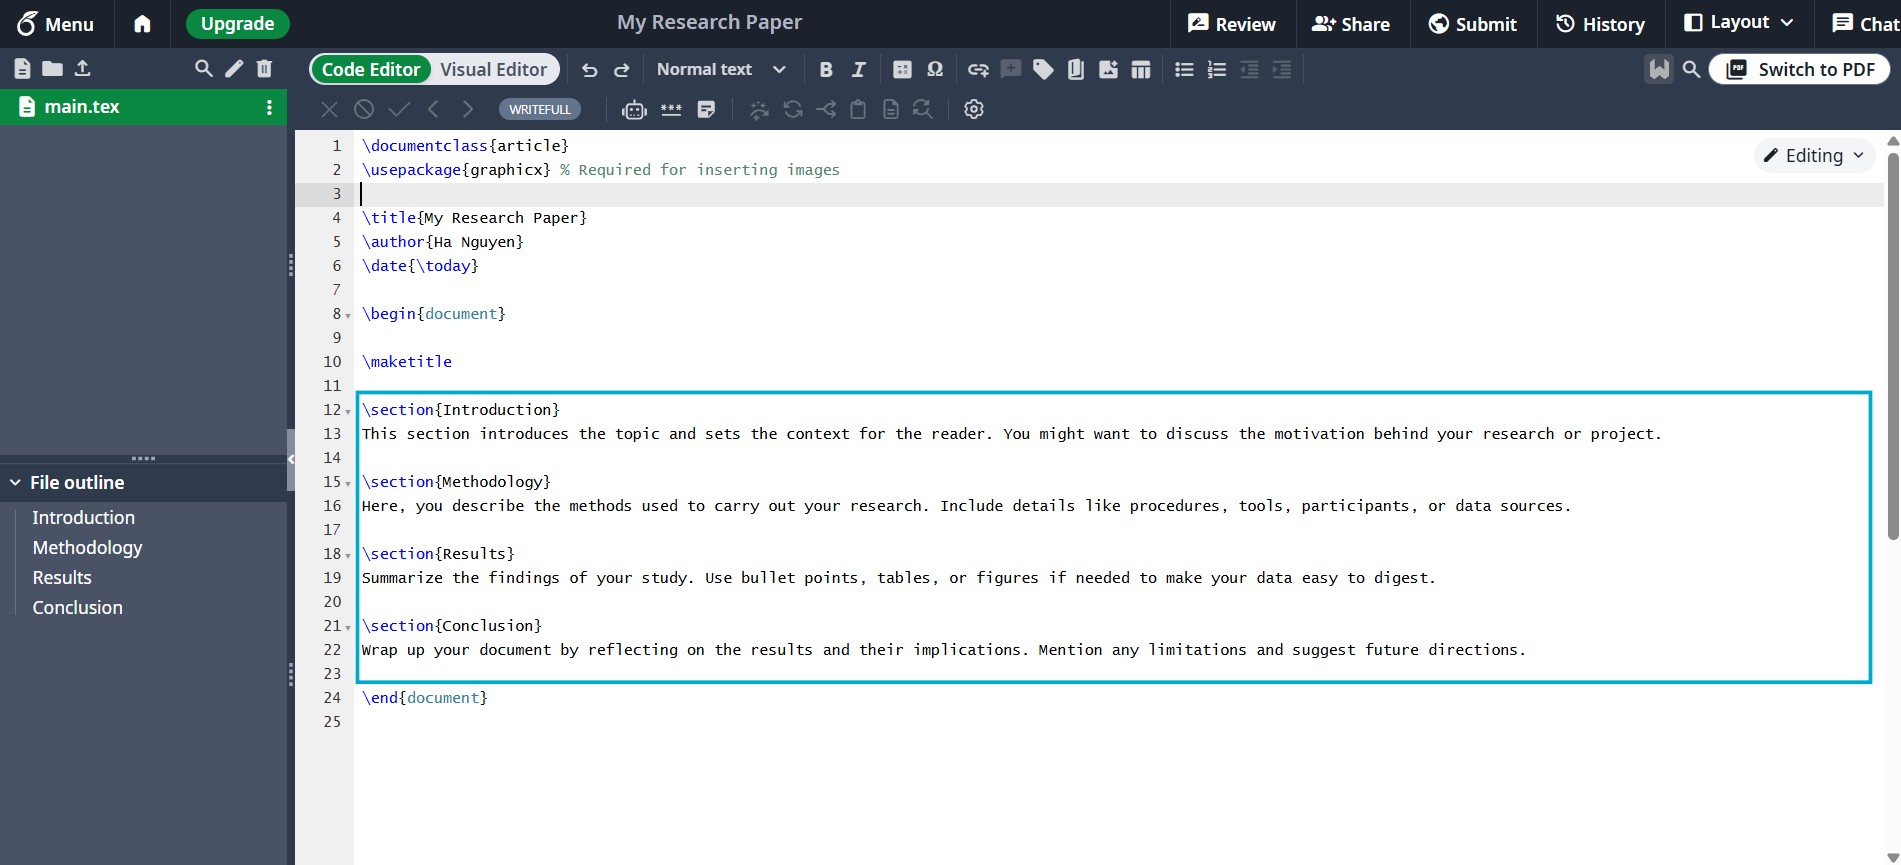
You can also add sections like:
\section{}– top-level heading\subsection{}– subsection\subsubsection{}– further breakdown
3.3 Managing References with BibTeX
- Create a references file in your Overleaf project by clicking the New file icon:
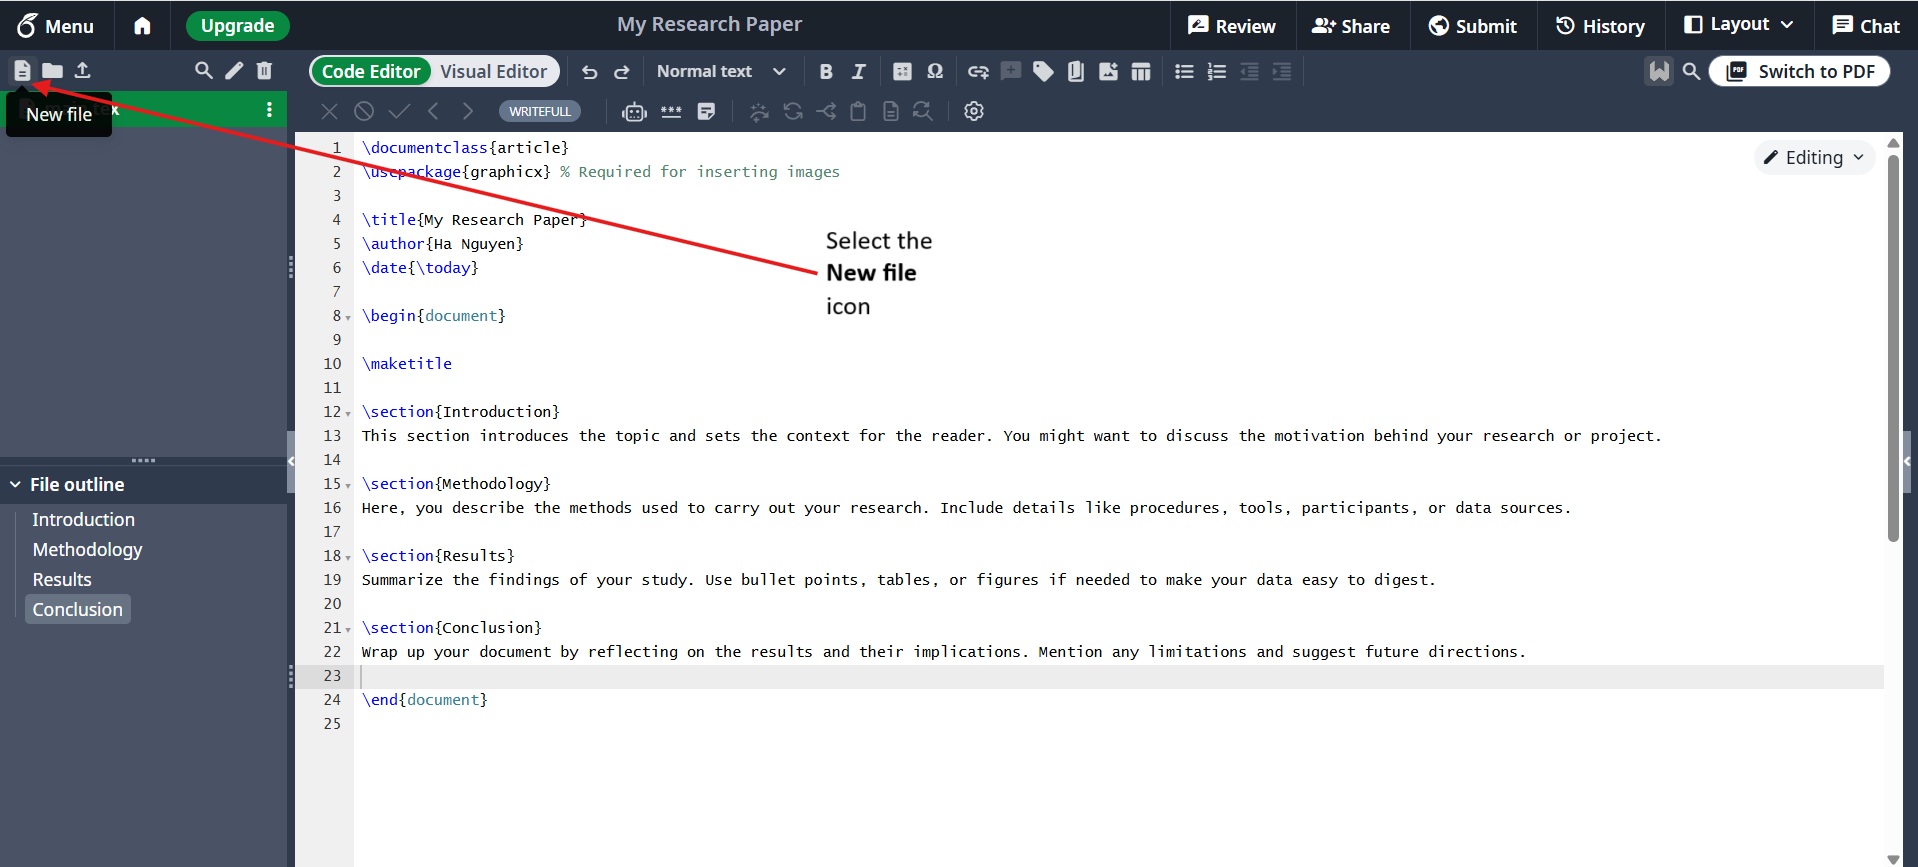
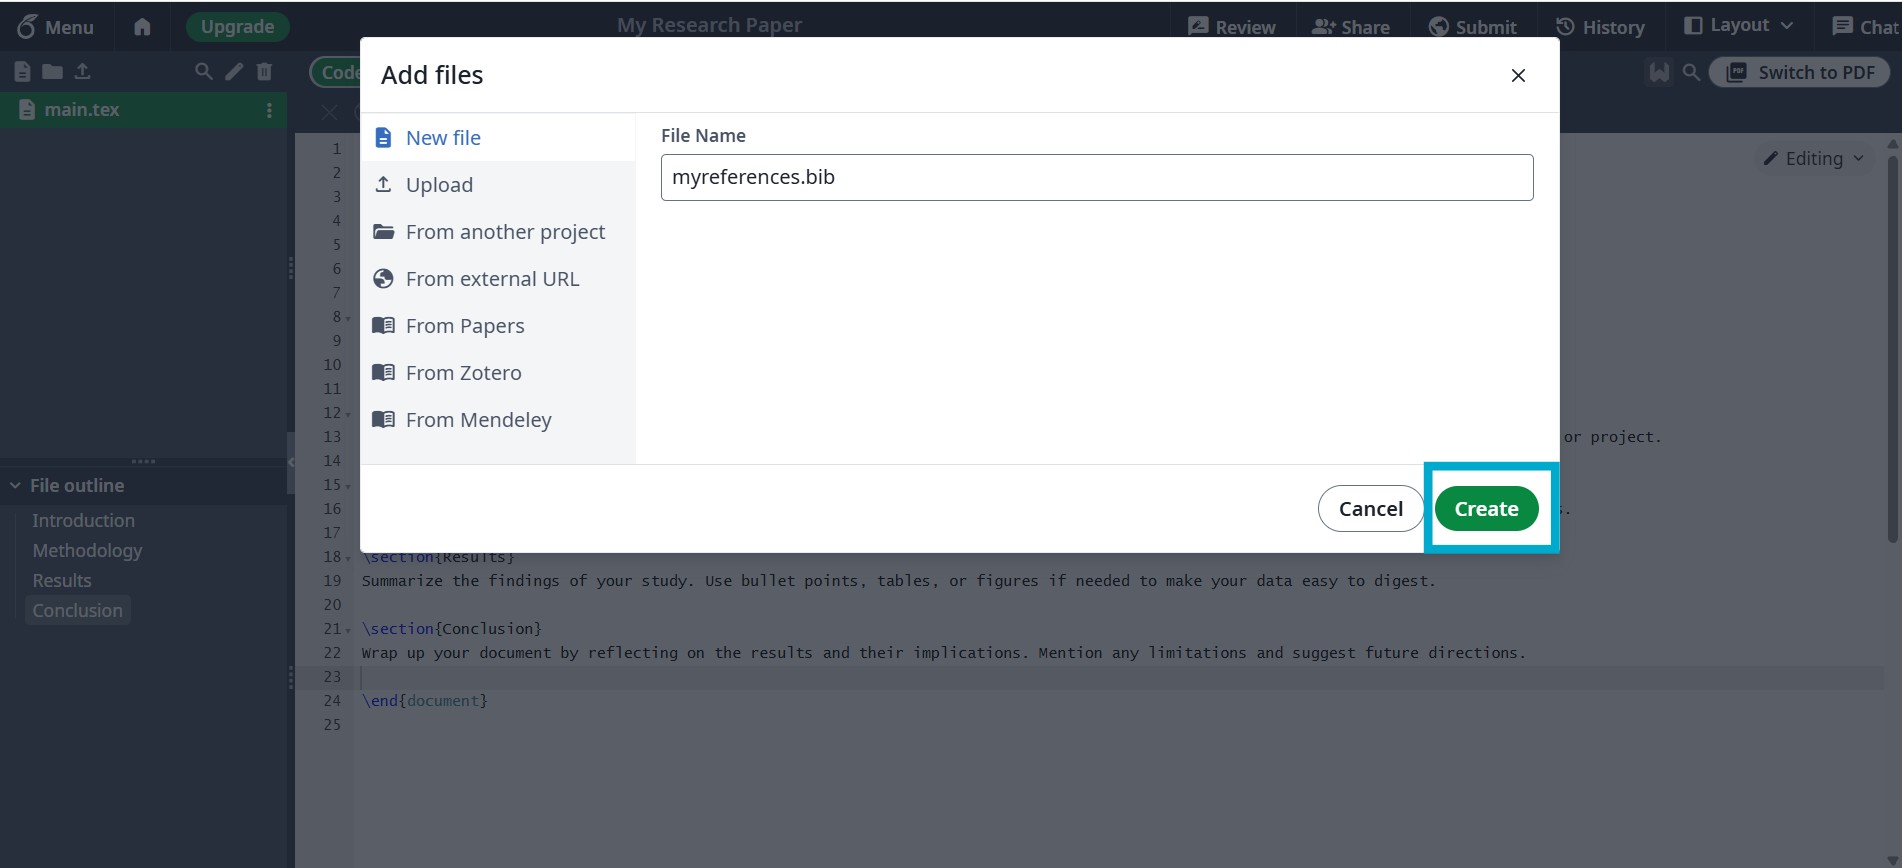
The file should have the .bib extension. FOr example, we call it myreference.bib. Now click on Create.
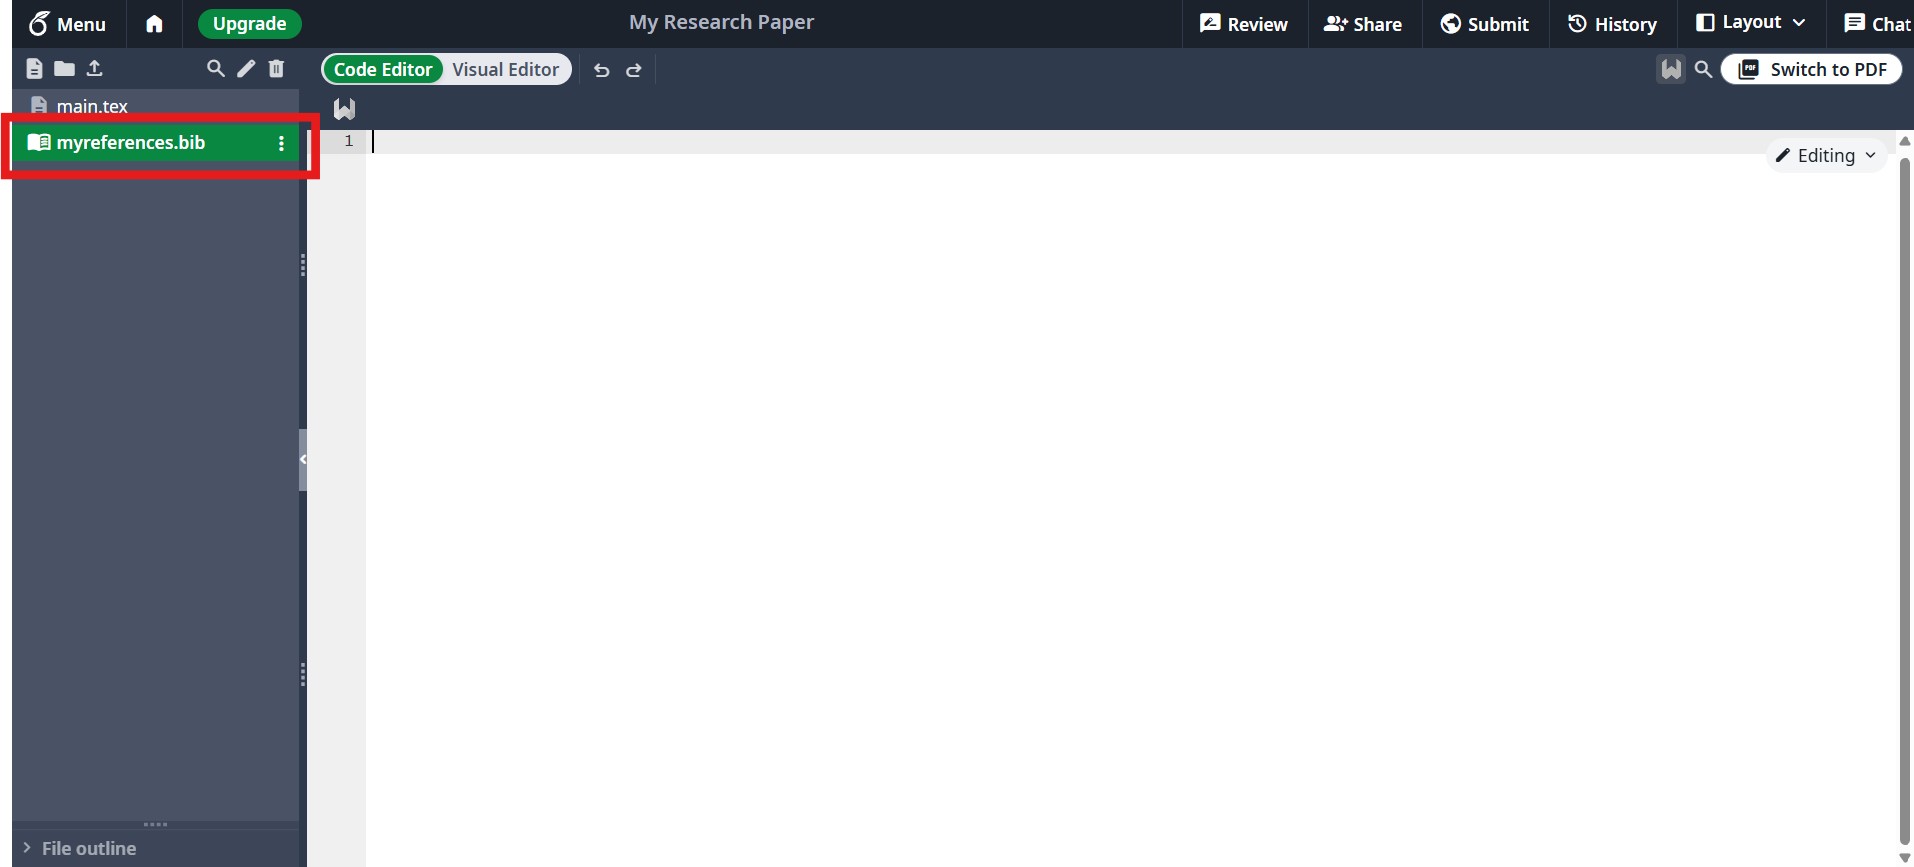
A new file will be listed in the left panel, click it to edit its contents. Add your bibliography entries there.
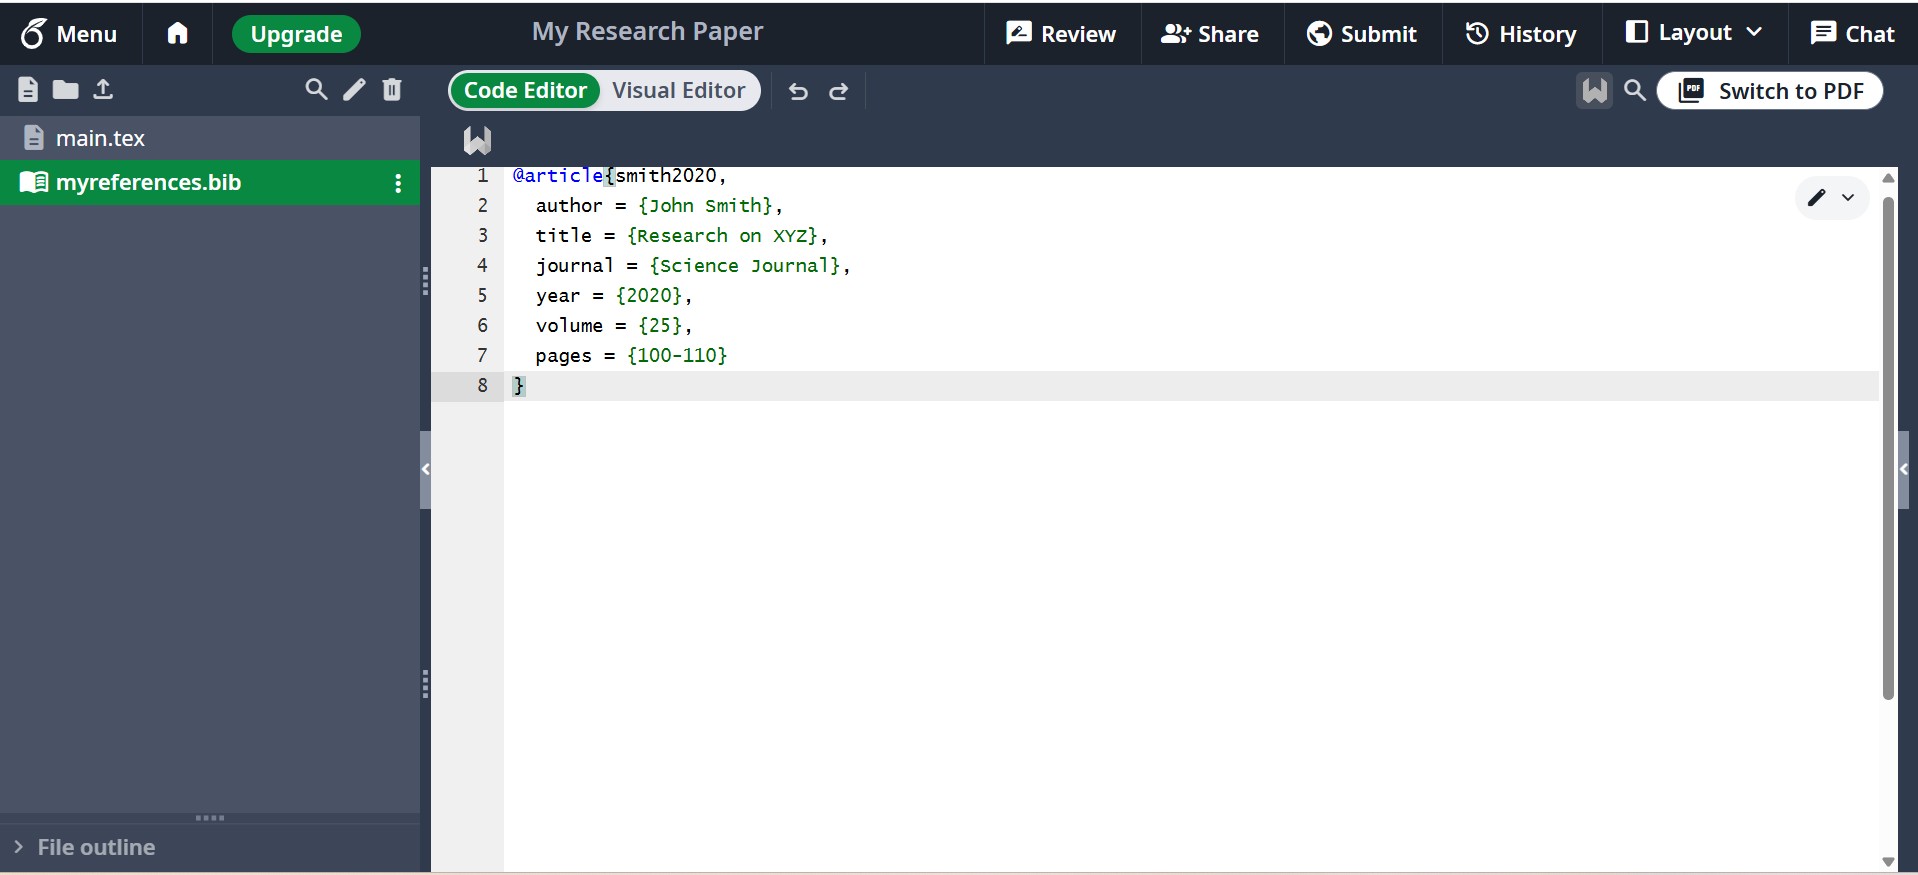
- Add your BibTeX entries (e.g., exported from Zotero or Google Scholar or create on your own)
In this example, we will create it manually in the myreference.bib file.
@article{smith2020,
  author = {John Smith},
  title = {Research on XYZ},
  journal = {Science Journal},
  year = {2020},
  volume = {25},
  pages = {100-110}
}
How it looks on the myreferences.bib:
- Cite and Include References
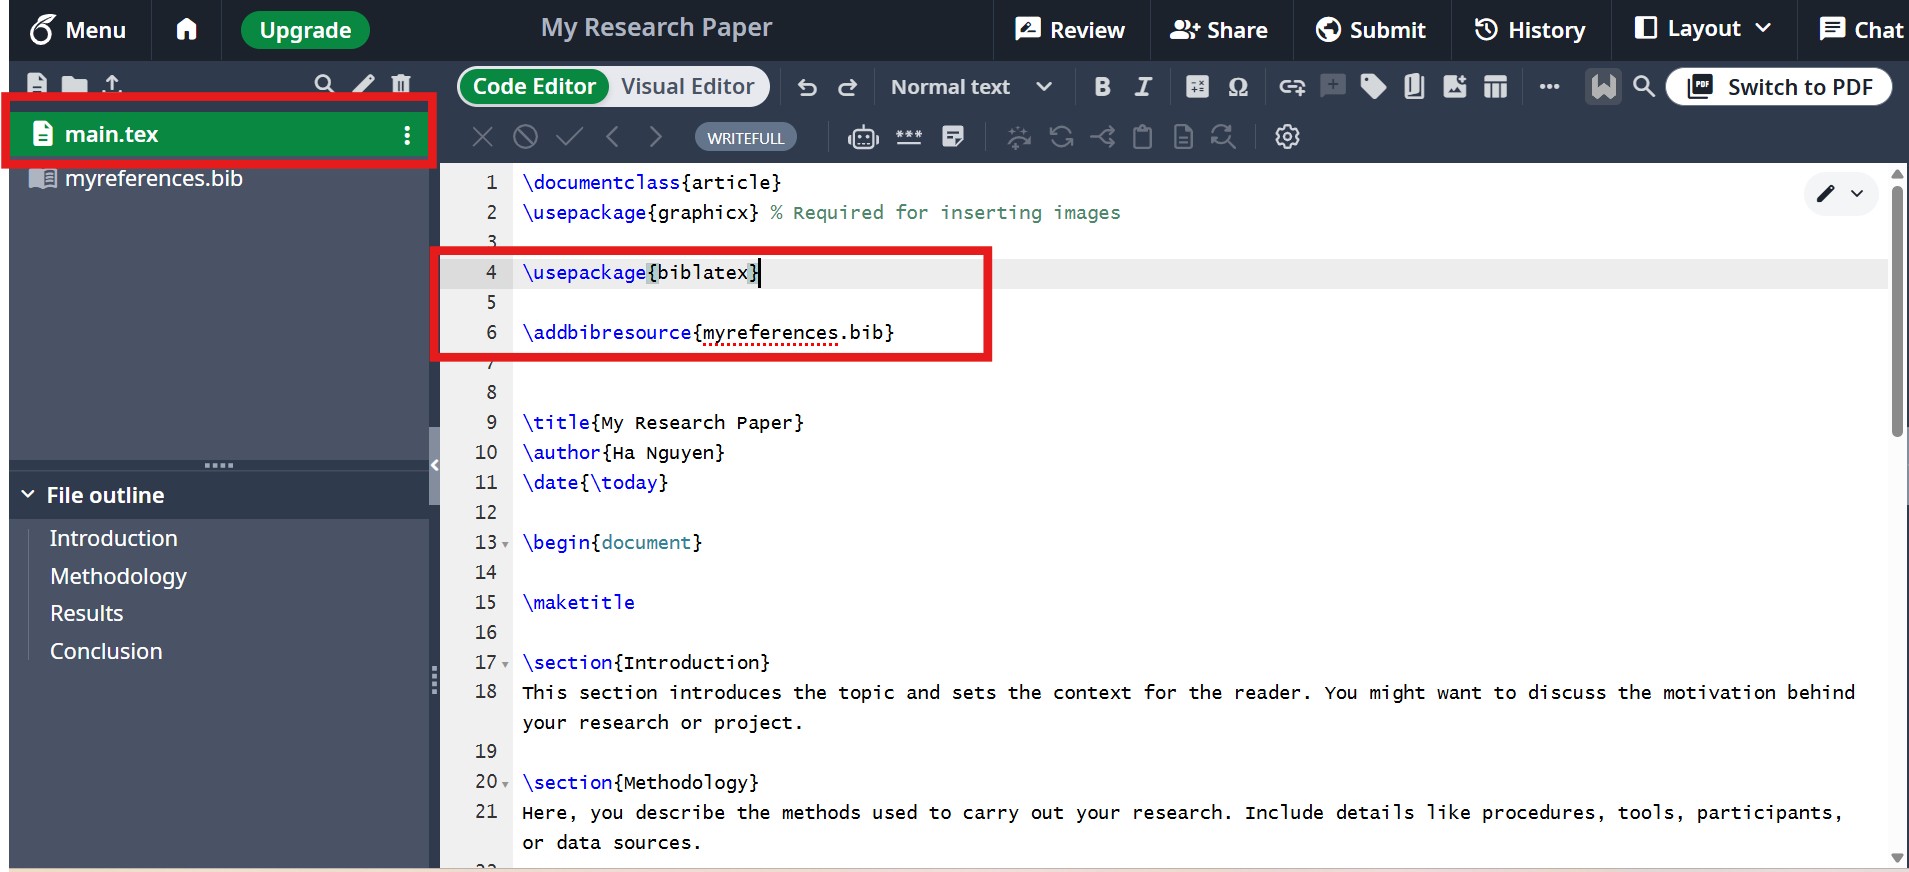
Now we back to the main.tex window. In the working window, we need to add biblatex package in the preamble section in order for Overleaf to read your references. The command for it is: /usepackage{biblatex}.
Then, \addbibresource{your_references_file_name.bib} command is used in LaTeX (with the biblatex package) to load your bibliography file into the document. In this case the file name is “myferences.bib”:
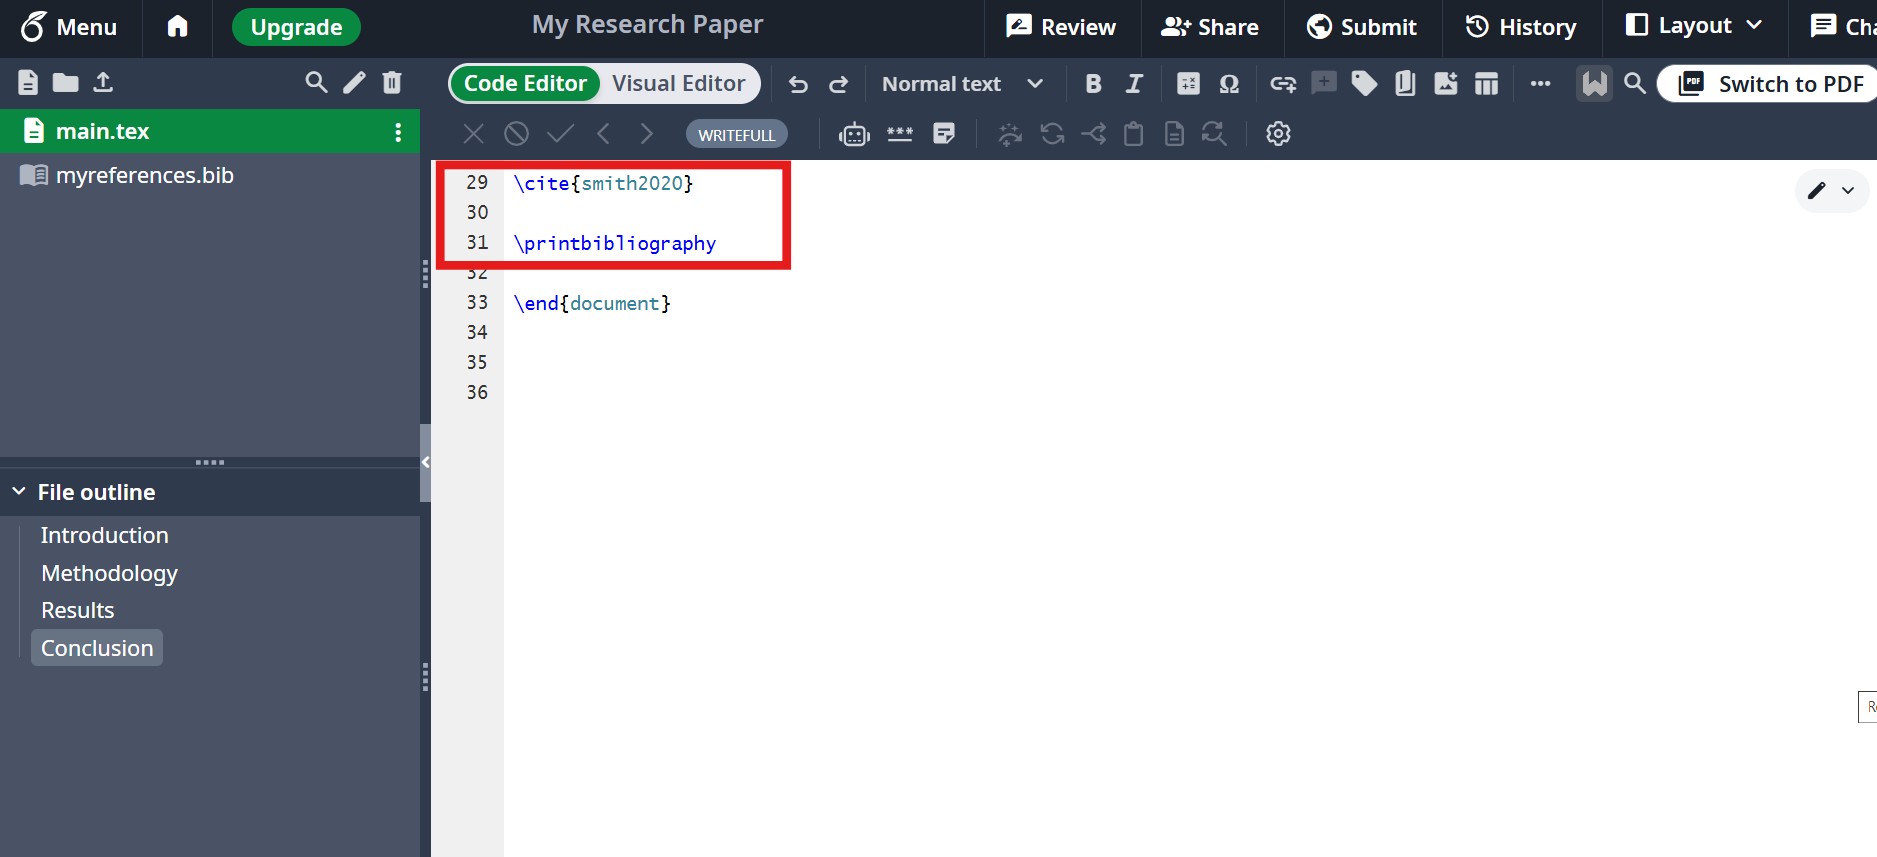
To cite the citation in the end of the article, we use the command \cite{reference_name} and \printbibliography. In this case we have already made the reference name smith2020 above.
3.4 Collaborating with Co-authors
Overleaf supports real-time collaboration:
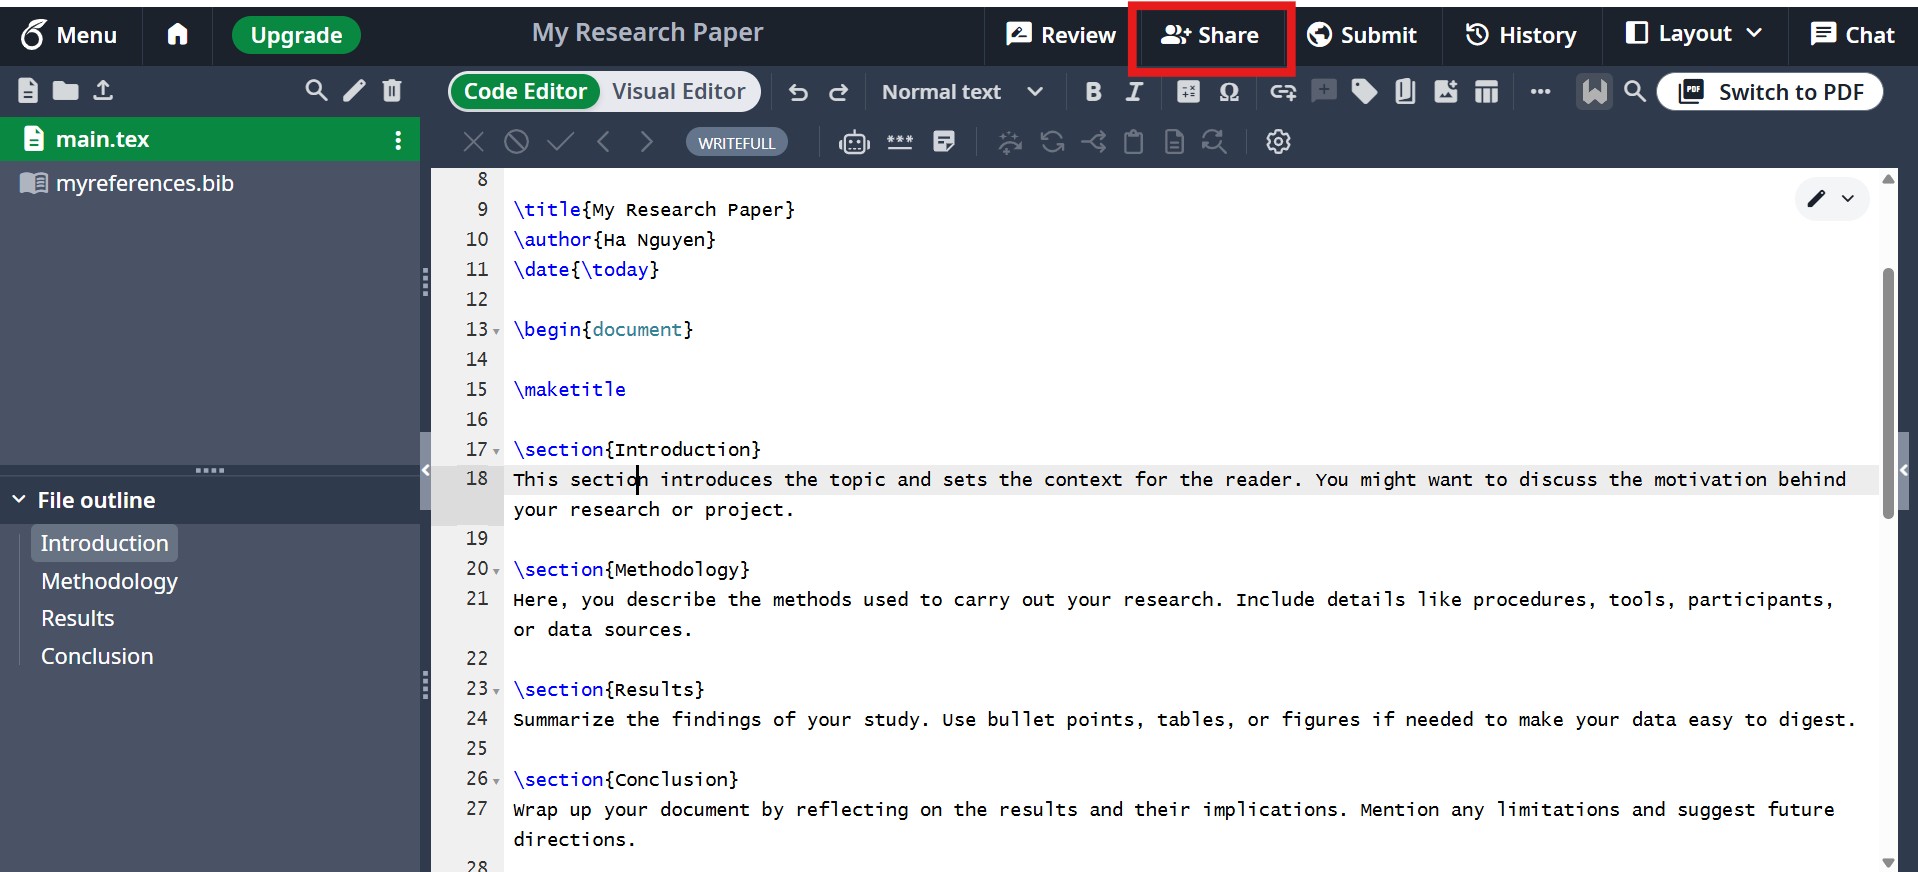
- Click Share at the top-right.
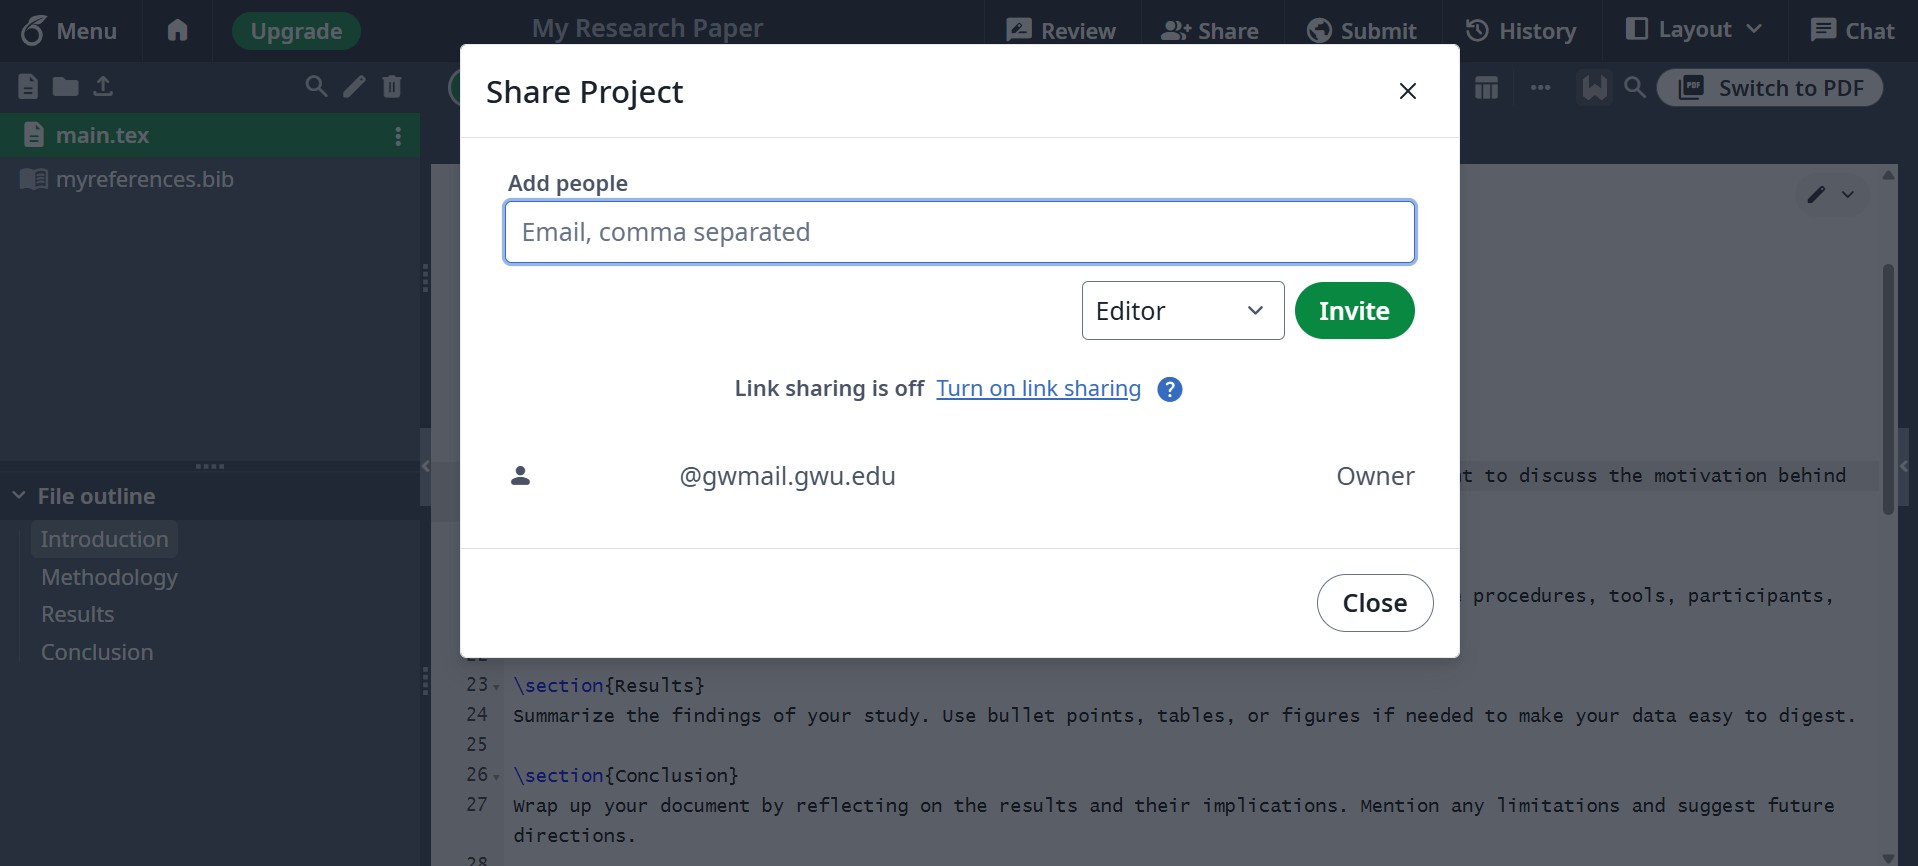
- Choose Link Sharing or invite via email. Choose “Editor” if you want co-authors to write. Then click Invite
- Use History & Revisions to track all changes.
3.5 Compiling and Submitting
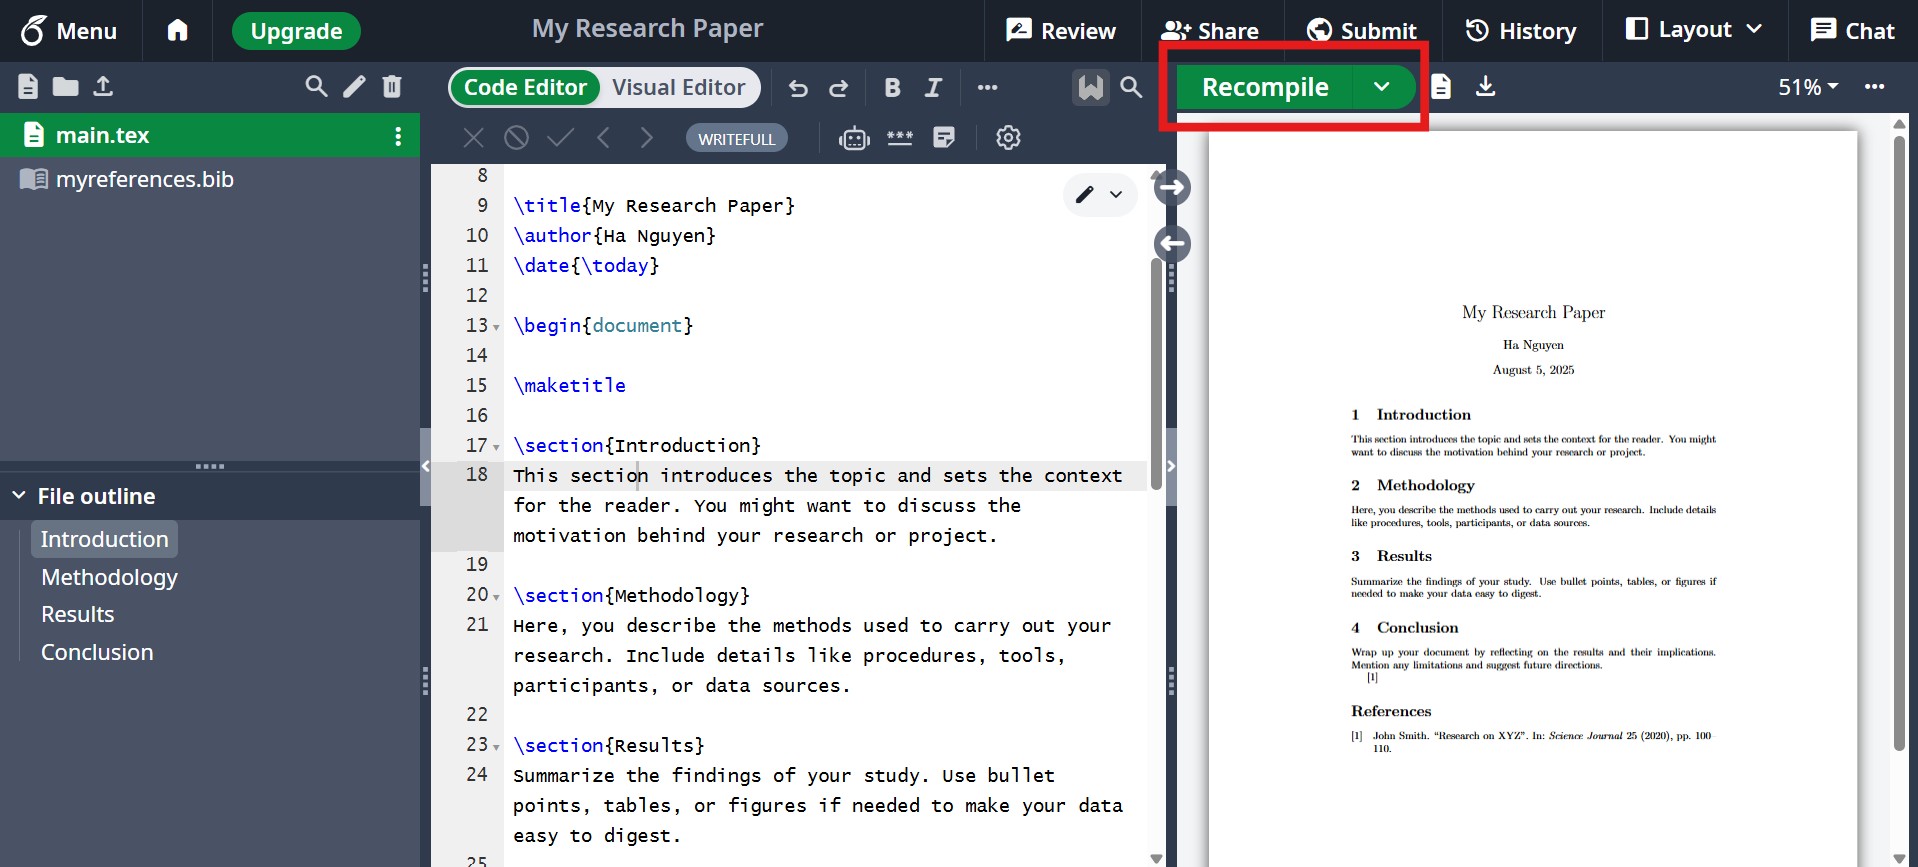
- Click Recompile to generate the PDF.
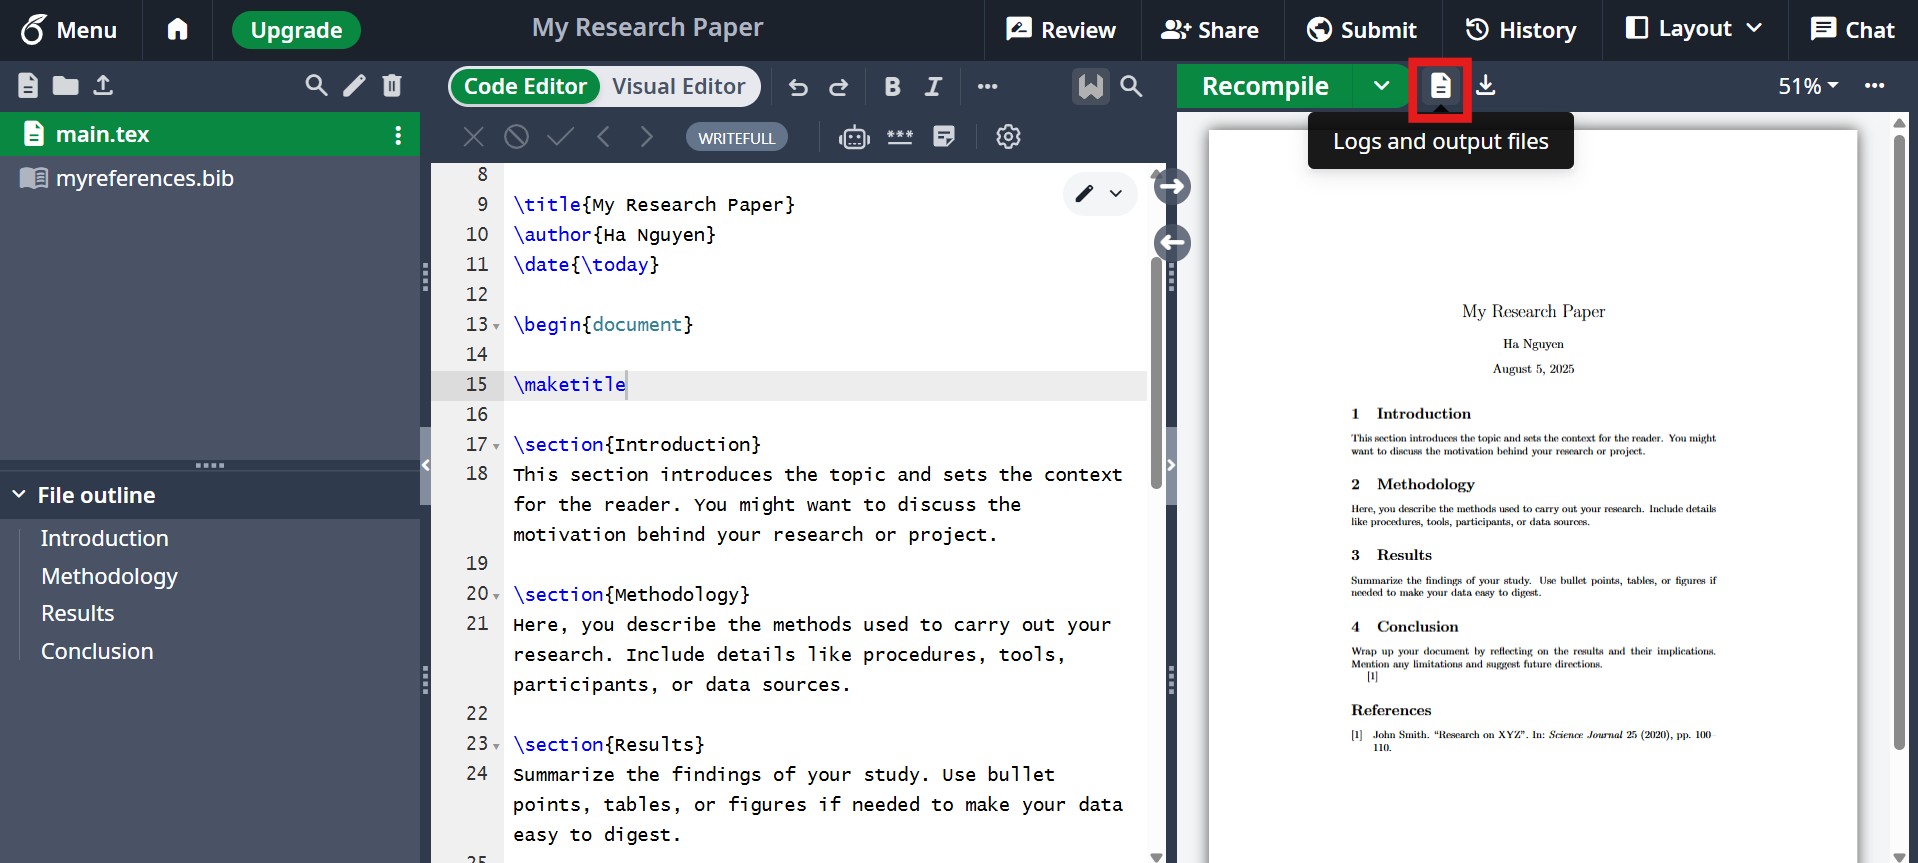
- Fix any errors in the Logs tab.
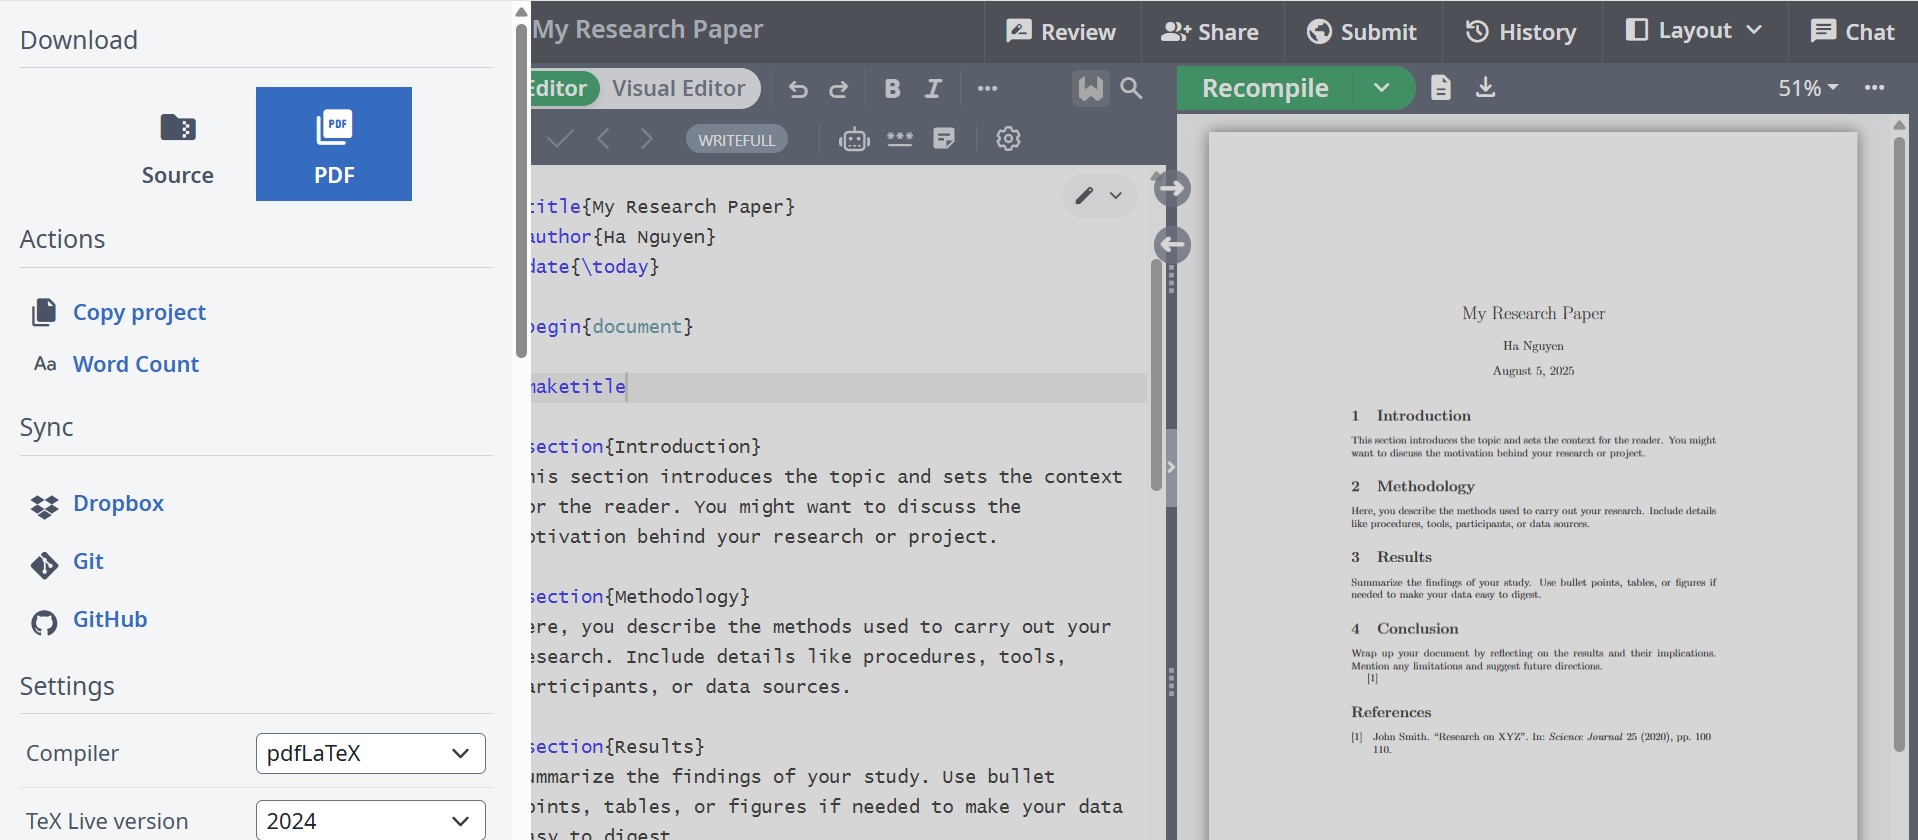
- Download final PDF via Menu (At the top left corner of the working window) → Download PDF.
- Submit to your journal or upload to your university system.
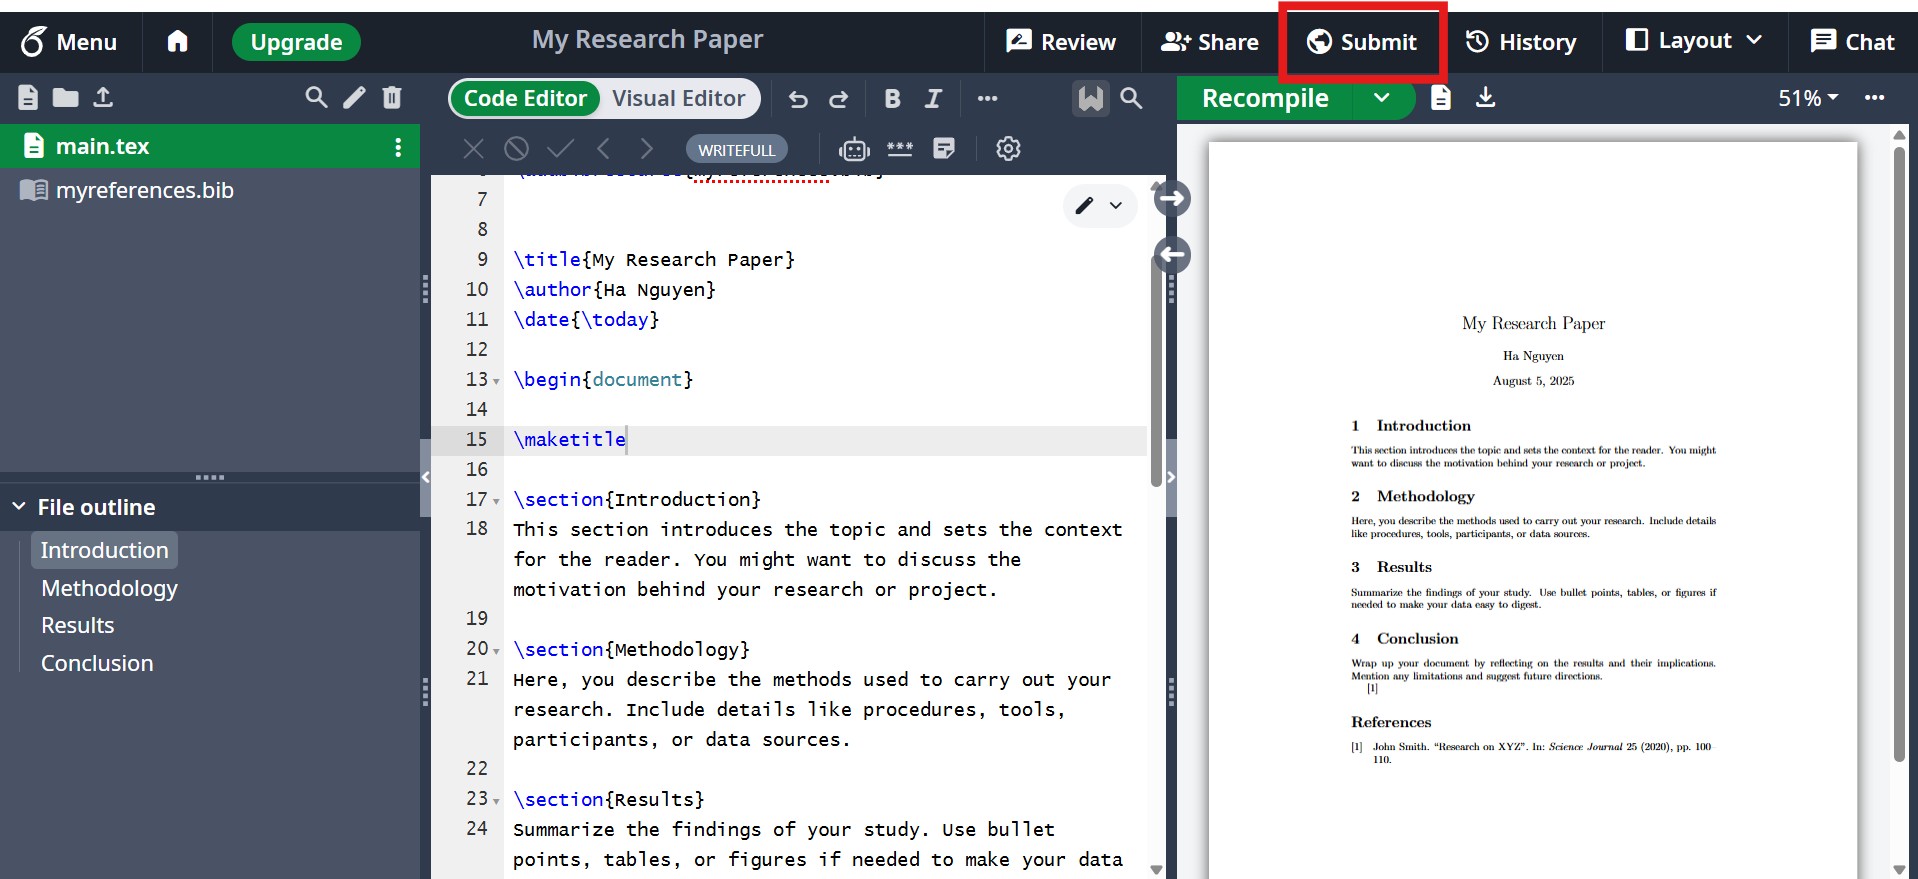
You can submit directly to journal via Overleaf!!